1. Ubuntu 서버에 Jenkins 설치
$ sudo apt-get install nmap
$ nmap localhost (사용중인 포트 확인)

$ wget -q -O - https://pkg.jenkins.io/debian/jenkins-ci.org.key | sudo apt-key add -
$ echo deb https://pkg.jenkins.io/debian-stable binary/ | sudo tee /etc/apt/sources.list.d/jenkins.list
$ apt-get update
$ apt-get install jenkins

$sudo vi /etc/default/jenkins (jenkins 포트 변경)
      - 다음 찾아서 포트 변경
      # port for HTTP connector (default 8080; disable with -1)
      HTTP_PORT=(미사용중인 포트로 변경)

$ sudo systemctl start jenkins (jenkins 실행)
$ sudo systemctl status jenkins (jenkins 상태 확인)
● jenkins.service - LSB: Start Jenkins at boot time
   Loaded: loaded (/etc/init.d/jenkins; bad; vendor preset: enabled)
   Active: active (exited) since Wed 2017-12-27 23:23:36 KST; 16min ago
     Docs: man:systemd-sysv-generator(8)
- http://<서버 IP>:(변경포트) 접속
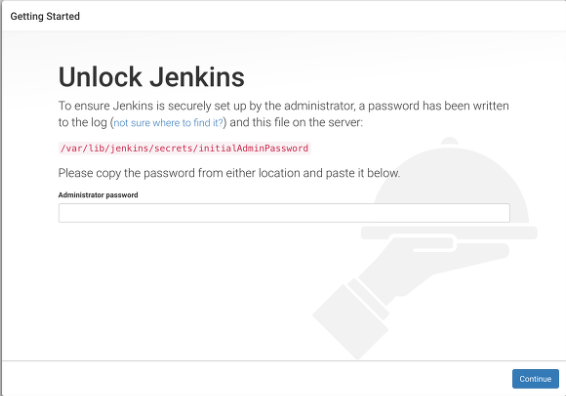
- /var/lib/jenkins/secrets/initialAdminPassword 경로에 있는 password 확인하여 입력
$cat /var/lib/jenkins/secrets/initialAdminPassword- Install suggested plugins 선택

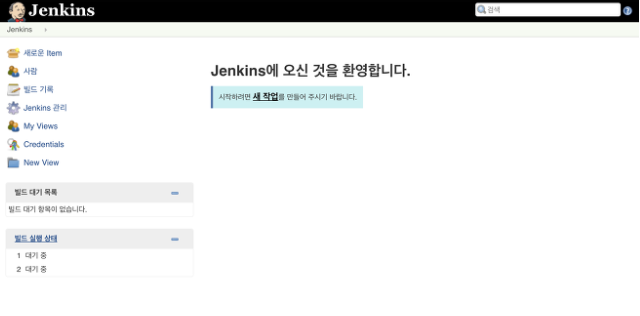
- 계정명, 암호, 이름, 이메일 주소 입력 후 save and finish 클릭
- jenkins 접속
2. Jenkins 플러그인 설치
- Jenkins 관리 > 플러그인 관리 > 설치가능
- gitlab plugin 설치
3. SSH 키 생성
- 젠킨스 설치되어 있는 서버에 키 생성
$ssh-keygen -t rsa -f id_rsa
Generating public/private rsa key pair.
Enter passphrase (empty for no passphrase):
Enter same passphrase again:
Your identification has been saved in id_rsa.
Your public key has been saved in id_rsa.pub.
The key fingerprint is:
SHA256:~~~~~ ~~~@~~~~~
The key's randomart image is:
+---[RSA 2048]----+
| o*+**=*=**+ |
| o B=o+o++o |
| E+.o+ + oo .|
| oo. * o ...|
| .+ S = o |
| . + o . |
| . . . |
| . |
| |
+----[SHA256]-----+
$ ls
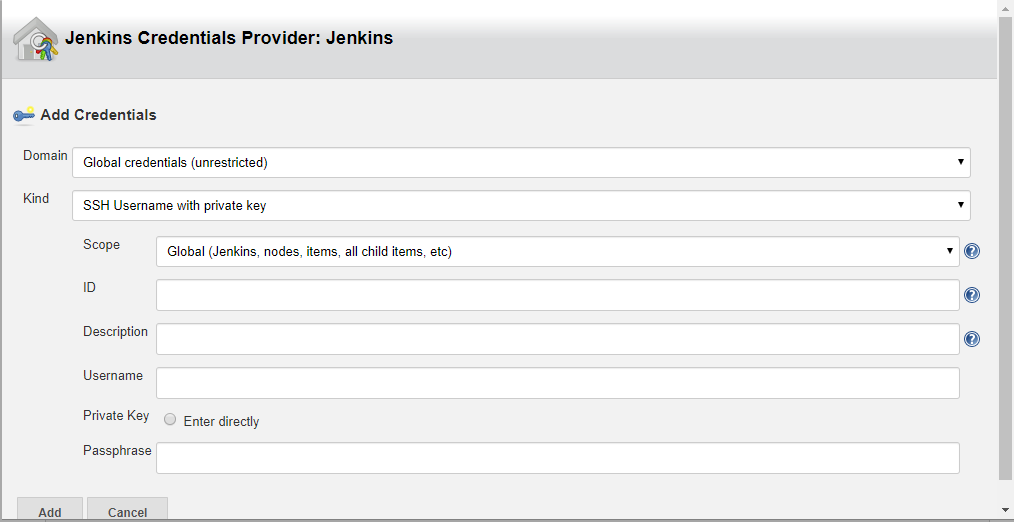
id_rsa id_rsa.pub- 개인키(id_rsa)는 젠킨스에 설정해준다. (처음부터 끝까지 복사, 빼먹으면 안됨)
$cat id_rsa
-----BEGIN RSA PRIVATE KEY-----
<키값>
-----END RSA PRIVATE KEY-----
- Jenkins - credential - system - Global credential - Add Credential

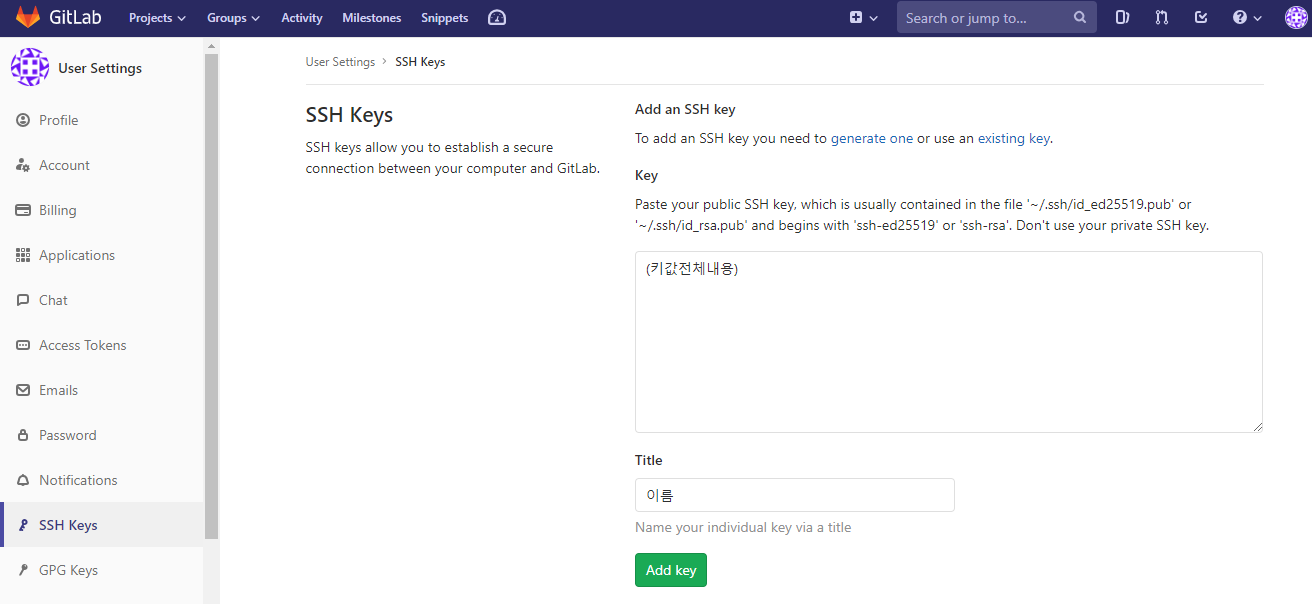
- 공개키 (id_rsa.pub)는 gitlab에 설정
$cat id_rsa.pub
(키값전체내용)
- Gitlab - user settings - SSH keys
4. Jenkins 설정 및 새로운 Item 생성
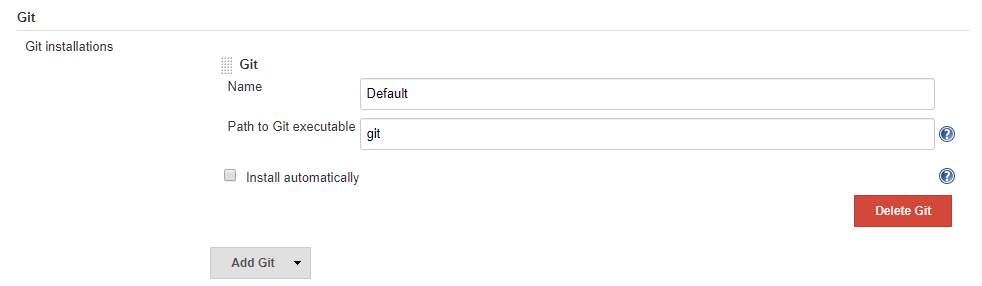
- Jenkins 관리 - Global Tool Configuration
- JDK 설정

- Git
- Maven

- 새로운 Item
item이름 입력 및 freestyle project 선택
- Git Project URL 연결
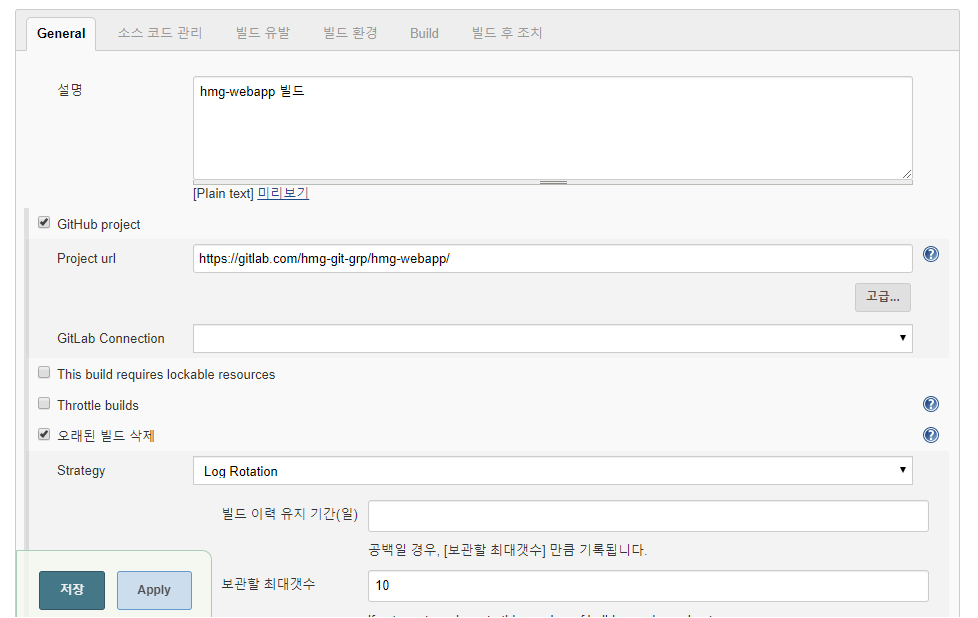
- git Repository Url 입력 (ssh로 연결, private key 입력 필요 ( public key는 gitlab에 등록 ))

- 빌드 관련 매개변수 설정

tomcat:redeploy
톰캣 매니저( Tomcat manager )와 통신해서 war파일을 deploy 하겠다는 의미입니다.
-P production
뒤에서 pom.xml 파일에 <profile>을 작성할 것인데, 이 설정은 <id>가 production인 <profile>설정 그대로를 컴파일 하라는 의미입니다.
윈도우 환경의 이클립스에서 톰캣의 Servlet은 런타임 환경에서 자동으로 classpath에 잡히지만, 리눅스에서는 이클립스를 사용하지 않기 때문에 <profile>설정을 해줘야 합니다.
( 그동안 이클립스에서 maven으로 build를 하지 않기 때문에, pom.xml 파일에서 <profile>을 설정하지 않았습니다. )
-D maven.test.skip=true
테스트를 생략하겠다는 설정입니다.
Junit을 사용하지 않을 것이므로 생략했습니다.
5. pom.xml 변경
UTF-8 설정
	<properties>
		<java-version>1.6</java-version>
		<org.springframework-version>3.2.9.RELEASE</org.springframework-version>
		<org.aspectj-version>1.6.10</org.aspectj-version>
		<org.slf4j-version>1.6.6</org.slf4j-version>

        <!-- Jenkins에서 사용하는 부분 -->
		<project.build.sourceEncoding>UTF-8</project.build.sourceEncoding>
		<project.reporting.outputEncoding>UTF-8</project.reporting.outputEncoding>

	</properties>
jenkins에서 이용할 production 설정
	<dependencies>
		// ... 생략
	</dependencies>

    <!-- Jenkins에서 사용하는 부분 -->
	<profiles>
		<profile>
			<id>production</id>
			<build>
				<resources>
					<resource>
						<directory>${project.basedir}/src/main/resources</directory>
						<excludes>
							<exclude>**/*.java</exclude>
						</excludes>
					</resource>
				</resources>
				<plugins>
					<plugin>
						<groupId>org.apache.maven.plugins</groupId>
						<artifactId>maven-resources-plugin</artifactId>
						<configuration>
							<encoding>UTF-8</encoding>
						</configuration>
					</plugin>
				</plugins>
			</build>
			<dependencies>
				<!-- Servlet -->
				<dependency>
					<groupId>javax.servlet</groupId>
					<artifactId>javax.servlet-api</artifactId>
					<version>3.0.1</version>
					<scope>provided</scope>
				</dependency>
				<dependency>
					<groupId>javax.servlet.jsp</groupId>
					<artifactId>jsp-api</artifactId>
					<version>2.0</version>
					<scope>provided</scope>
				</dependency>
			</dependencies>
		</profile>
	</profiles>
톰캣 매니저 관련 설정
            <!-- Jenkins에서 사용하는 부분 -->
			<plugin>
			    <groupId>org.codehaus.mojo</groupId>
			    <artifactId>tomcat-maven-plugin</artifactId>
			    <configuration>
			        <url>http://localhost:8080/manager/text</url>
			        <path>/hmgWebapp</path>
					<username>(tomcat manager ID입력)</username>
					<password>(tomcat manager PW입력)</password>
			    </configuration>
			</plugin>
6. jenkins maven 빌드시 pom.xml 경로 변경 ( 필요 시 )
- Jenkins에서 빌드하려 할 때 pom.xml 경로를 잘못 찾아 pom.xml이 없다고 에러로그가 발생하는 경우가 있다. 그럴 경우 수동으로 pom.xml 경로를 설정해줄 수 있다.
- Jenkins - 프로젝트 선택 - 구성 - Build - 고급 - POM에 pom.xml 경로 직접 설정해줌
(예:/var/lib/jenkins/workspace/hmg-webapp/pom.xml)
'DEV > Spring' 카테고리의 다른 글
| Oracle DB TestContainers 통합 테스트 구현 (0) | 2023.10.25 |
|---|---|
| [Spring] 5. Ubuntu 서버 기본 설정 (0) | 2019.07.13 |
| [Spring] 4. Eclipse와 GitLab 연동하기 (0) | 2019.07.13 |
| [Spring] 3. 네이버 클라우드 이용한 Ubuntu 서버 생성 (0) | 2019.07.13 |
| [Spring] 2. 초기 프로젝트 설정 (0) | 2019.07.13 |


댓글